Notifications - Settings
Update: 12.12.2024
The Notifications module enables system notifications for data and process statuses recorded in Microsoft Dynamics 365 Business Central. Notification works both internally in the system environment and externally in the form of an e-mail. The module can work off-line, as it does not respond to an immediate change in the data, but sends information at scheduled intervals. In addition to tracking the current event, it is also possible to monitor the development of the event over time.
Create and edit Event Template Card
To create a new tracked event, you need to create and define it on the Overview page of Event Templates List.
- Choose the
 icon, enter Event Templates and then choose the related link.
 - On the Event Templates List page, create a new event by choosing the New button
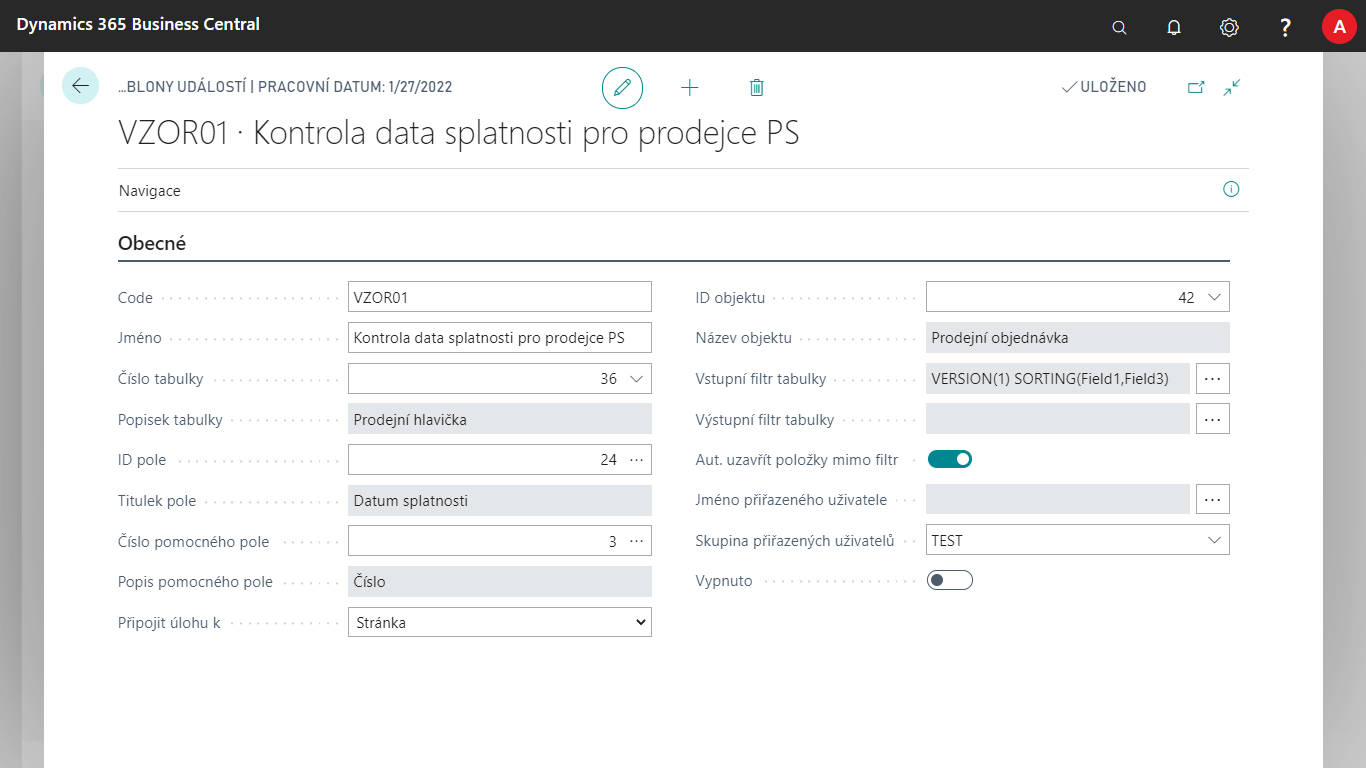
- A new event tab opens with some generic pre-filled fields.
- In the Table No. field, select the table above which we want to perform tracking and then select the field No. from the table – according to this field, the given stage is evaluated. Helping Field No. is used only for a closer resolution of the event.
- In the Attach task to box, choose whether to open the page or report after the event appears in Event Entries. The object ID field then specifies in more detail which one.
- In the Input Table Filter filter field, choose which items from the table to enter or not to enter for further processing.
- In the Table Output Filter field, choose to refine the filter.
- To close items that pass out of the filter, automatically select the Close Entries Out of Filter check box.
- Use Assigned User Name or Assigned User Task Group fields to set who the subsequent task you create will be assigned to.
- To start watching the event, uncheck Disabled box. This determines whether the field is tracked or not.
Note
The Field No. functionality also works with calculated fields and is an optional field.

Data filter settings
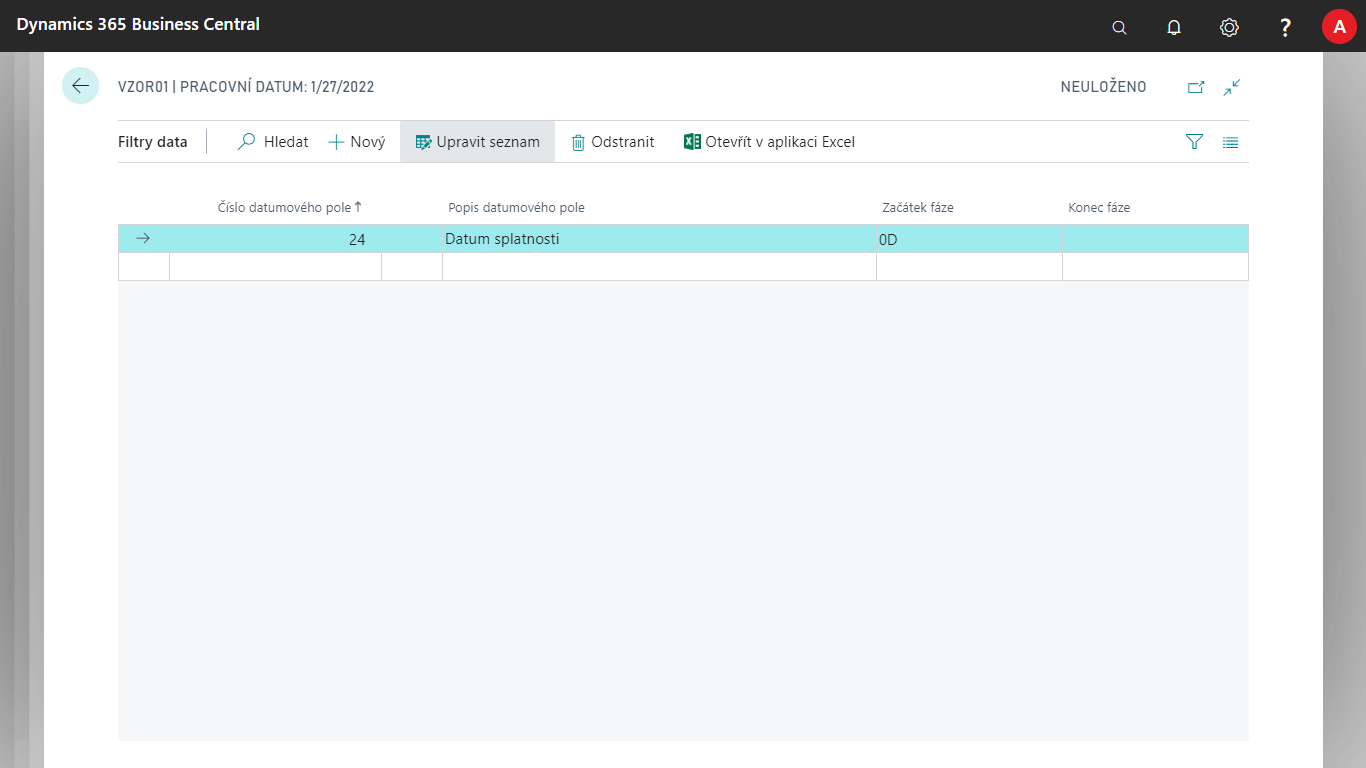
In addition to setting filters on the Event Templates page in the Output and Input Filter fields, we can also set field filters using the Date Filters option. We set it up as follows.

- On the Event Template page, choose the Date Filters action
- Set the Date field numberto which the filter will apply.
- Here, in Start Phase and End Phase boxes, enter a date formula related to the system date (TODAY).
Set up Event Phases
For each Event Template Card, you need to set the phases that the event can reach when the conditions are met.
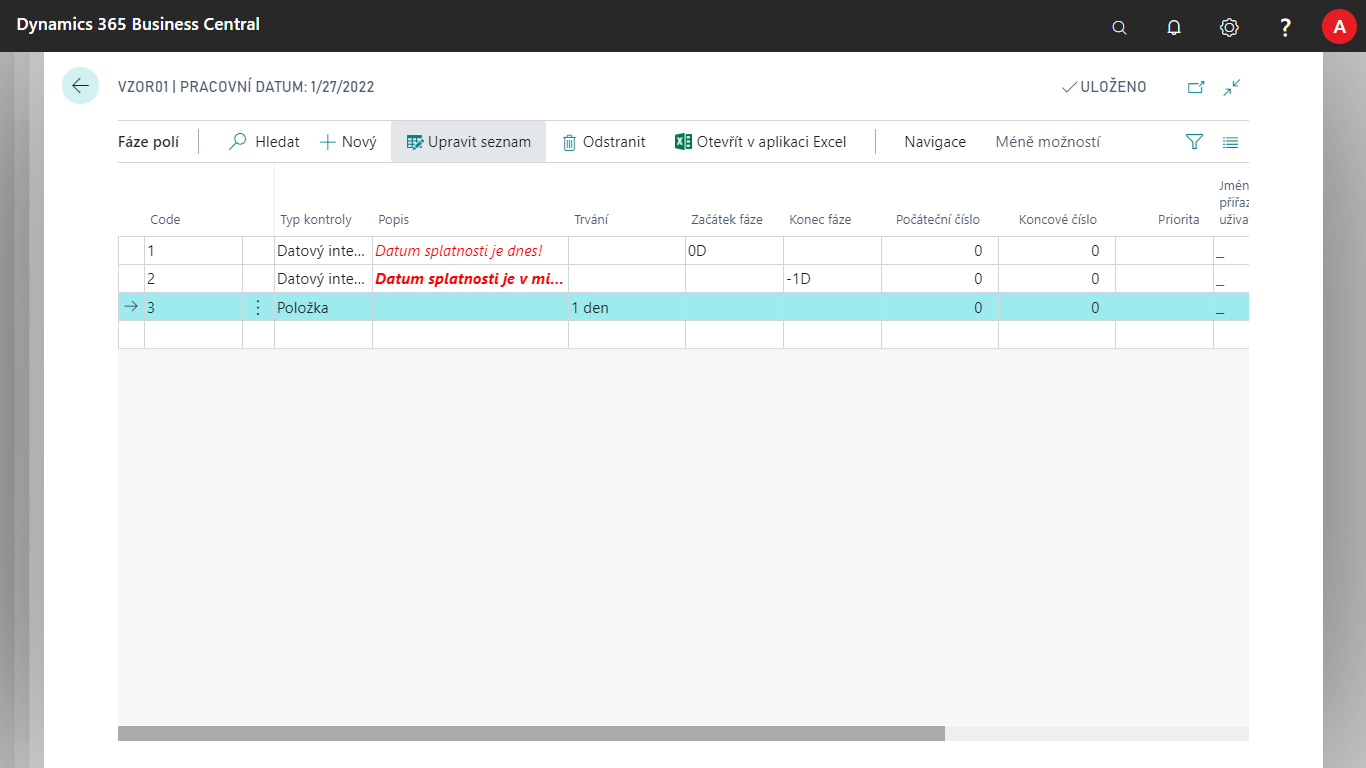
- On the Event Template Cards page, choose the Phases action.
- Create a new line using the New button.
- For each line, enter a Code that is used to distinguish between the stages of tracking.
- Choose Control Type. It takes values Entry, Date Interval or Numerical Interval. When selecting phases, the highest priority is to select Item, then Date Interval, and finally Numerical Interval. This field refers to the Field Number field from the Event Template Card.
Note
When selecting the Entry control type, the Period field is taken. Specifies how long the stage will last from the time the alert item is created. Selecting Date Interval works with the Start Phase and End Phasefields. Therefore, a date formula related to the system date (TODAY) is entered. The Numerical Interval value, in turn, works with the Start Number and End Number fields.

Specify the addressee of e-mails
Each event phase can also be assigned an email address specifying to whom the event will be sent. There are three different ways to specify an email recipient that can be combined with each other. The email can then go to all three definitions for one item.

| Definition Type | Description |
|---|---|
| Manually defined email | Use this option if you always want to send notifications to this defined e-mail. |
| Dynamic email from a field in a record | Use this option if you want to send email alerts that are directly stored in a record in the source table of the alert template, which is also the source of the alert. (e.g. a notification above an employee's card, which also contains their e-mail). |
| Dynamic email from a relational table field | It is used in cases where we want to send an email alert that is stored in a relational table to the source table of the alert template with a link through one field that we set. For example, when notifying you of a sales document, when we want to send an email to the seller of the document. The email is then stored in the E-mail field in the Salesperson/Purchaser table, which is bound from the sales header through one field Salesperson Code – Code. |
Set up a Manually Defined Email
- Select the
 , enter Event Templates, and then select the related link.
 - On the Event Template Cards page, choose the Phases action.
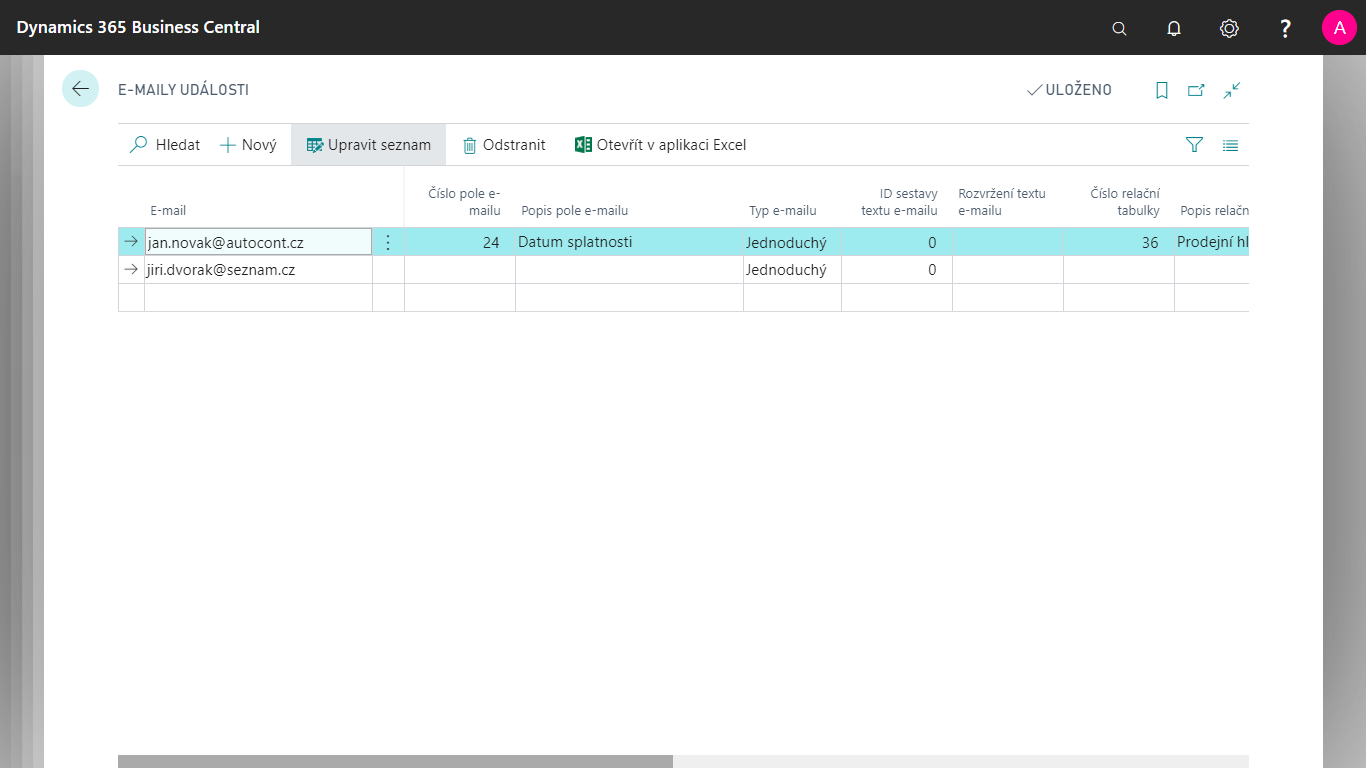
- Here select Field Phases action E-mails
- On the Event Emails page, choose ** New** action to fill in the Email field as needed.
Set up Dynamic Email from a field in a record
- Select the
 , enter Event Templates, and then select the related link.
 - On the Event Template Cards page, choose the Phases action.
- Here select Field Phases action E-mails
- On the Event Emails page, choose New action and fill in the Email Field No. field. This is a text box from a table defined by the event template.
Set up a dynamic email from a relational table fields
- Select the
 , enter Event Templates, and then select the related link.
 - On the Event Template Cards page, choose the Phases action.
- Here select Field Phases action E-mails
- Fill in Relational Table No. field with the table where the email field is located.
- In E-mail relational field number box, type the e-mail field in the relational table.
- In the Relation From Field No. field, enter the Event Template Tablefield that defines the relation to the relational table.
- In the Relation To Field Number box, type the field from the relational table on which the binding is defined.
Obsah E-mailů
There are two ways to define the content of an email (subject and body). With a fixed programmed structurethat we choose ourselves and will be used each time we run it, or with dynamic contentwhere the content is defined using fields and email texts.
Set up an email with a fixed structure
The subject of this type of email is the event template code and the phase description. The body of the email, in turn, is the content from the primary key field of the event item.
- Select the
 , enter Event Templates, and then select the related link.
 - On the Event Template Cards page, choose the Phases action.
- Here select Field Phases action E-mails
- Fill in Email Type field as Standard.
Set up an email with dynamic content
The subject and body of this kind of email are defined in the texts of the email using the email fields. The field itself can be defined from the following tables: Notification Template Source Table, Event Template, Field Phases.
- Select the
 , enter Event Templates, and then select the related link.
 - On the Event Template Cards page, choose the Phases action.
- Here select Field Phases action E-mails
- Fill in the Email Type field as Structured.
See also