Production Tools Setup
Updated: 01.12.2024
To use the module to its full potential, it must be configured according to the needs of the specific company. The individual configuration options are described below.
Production Tools Journal Templates
- Choose the
 icon, enter Production Tools Journal Templates in the search field, then select the relevant link.
 - The Production Tools Journal Templates page will open.
- Click the + New button to create a New template.
- In the Template Name field, enter a name that best describes the purpose of this template.
- In the Default item type field, select the item type, for example, Loan, if you want the template to be used only for recording loans.
- In the Document number series field, enter or select the number series that will be used to record movements.
- Save the template by clicking the Save button

Important
It is necessary to create at least one tool log template in order to enter tool movements.
Tip
It is possible to have one template for all types of movements, i.e., a template where you do not enter any Default Item Type when creating it.
Adding a Number series
- Click on the Number series field.
- The Number series page will open.
- Click on the + New button to create a new number series.
- In the Code field, enter a unique identifier for the number series.
- In the Description field, enter a brief description explaining the purpose of the number series.
- In the Start Number and End Number fields, enter the start and end numbers of the series.
- Check the Default numbers box if you want the system to automatically generate numbers in this number series.
- Save the number series by clicking the Save button.

Setting tool record item types
Each log template can have mandatory data checks defined. Follow these steps:
- Choose the icon, enter Tool record item type settings in the search field, then select the related link.
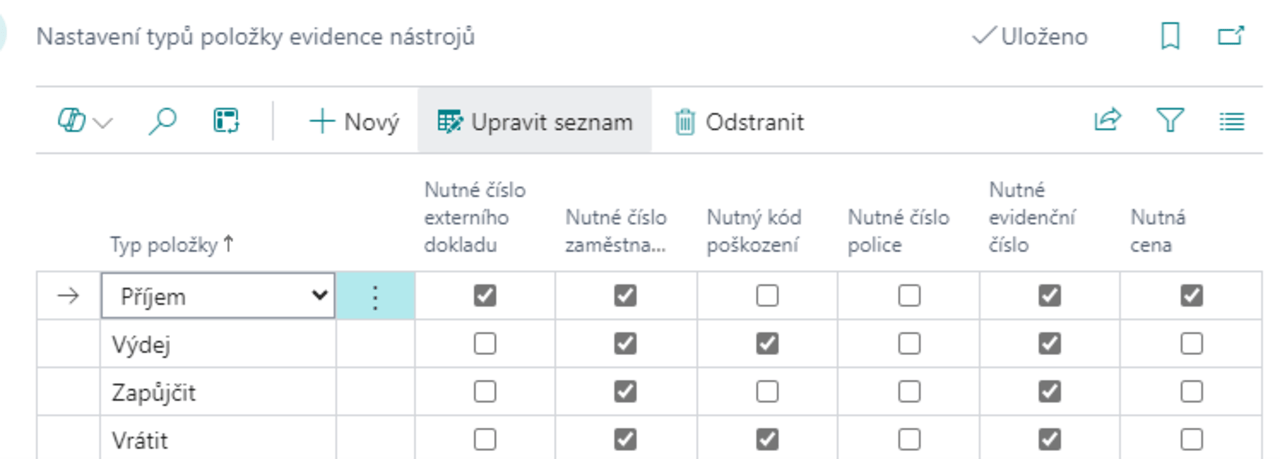
- The Tool record item type settings page will open.
- Click the + New button to create a new row for the given item type.
- Select the item type. The following options are available:
- Receipt – entry of the recorded quantity of the tool.
- Issue – removal of the tool from the inventory.
- Loan – recording of tool loan.
- Return – recording of the return of a loaned tool.
- For each item type, set the mandatory information that must be filled in the tool log.
Note
Mandatory data helps ensure the accuracy of log entries and proper tool records.
Damage Type Settings
Damage type settings are used to distinguish between damaged items in the inventory. This information can be used for possible compensation by employees who return damaged tools, or for later statistical evaluation.
- Choose the icon, enter Damage types in the search field, then select the relevant link.
- The Damage types page will open.
- To add a new damage type, click the + New button.
- Fill in the following fields:
- Code – a unique code for the damage type.
- Description – a verbal description of the damage.
- EAN – a barcode that can be used when working with barcode readers.
- Fill in the fields as needed and save the settings.

Note
Correctly defining damage types allows for more accurate records and better analysis of tool condition in the future..
See also